
Export your flowcharts to Microsoft Office
With QALITEL logigramme ProAd Fullweb
Word export
Export your flowcharts and processes directly into Microsoft Word. Your Word document updates automatically whenever you change your flowchart !
Excel export
Export your flowcharts and processes directly into Microsoft Excel. Your Excel sheet updates automatically whenever you change your flowchart !
PowerPoint export
Export your flowcharts and processes directly into Microsoft PowerPoint. Your PowerPoint presentation updates automatically whenever you change your flowchart !
Export a flowchart to Microsoft Office
In its ProAd version, QALITEL logigramme Fullweb lets you export your flowchart to a Microsoft Office file (Word, Excel, PowerPoint).
Each time you export, a file (.doc, .xlsx, etc. depending on the case) is generated with a live link pointing to your online flowchart. All you have to do is download this Word, Excel or PowerPoint file to your computer.
A live link is created between your Microsoft Office document and your flowchart. So if you edit your flowchart online using QALITEL logigramme (https://www.logigramme.io), the next time you open the Microsoft Office document you exported earlier, it will automatically update the flowchart(s) it contains !
You can edit your flowchart from either https://www.logigramme.io (All copies of your Word document will be updated)
Or from your exported and downloaded Microsoft Office document: you can open the dynamically embedded flowchart directly in QALITEL logigramme by holding the Ctrl key and left-clicking your mouse (Ctrl + left click).
Since you will have edited the source or reference flowchart, all copies of your Word document will be updated.
In your Microsoft Office document, you can resize this flowchart using the resize handles provided, or via the image properties window. You can personalise the document by saving it under another name. You can select the flowchart, copy it (Ctrl+C) and paste it (Ctrl+V) into any other Microsoft Office or LibreOffice document while keeping this live link.
Automatic export
It could not be simpler: in the export screen, choose the file type you want to export to, and QALITEL logigramme automatically generates the file (Word, Excel, etc.) containing your flowchart.
See the example below with Word. In this case, your Microsoft Office document contains only one flowchart. If you want your Microsoft Office document to contain several flowcharts, this is perfectly possible, as explained below.
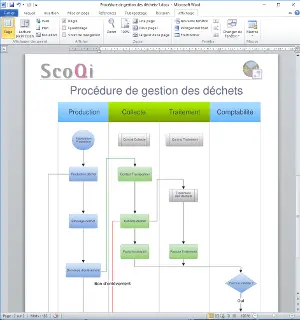
The procedures below explain how to manually insert your dynamic flowchart into your Microsoft Office document, so that it can contain as many different flowcharts as you like.
QALITEL logigramme and the Microsoft Office suite — example with Word
This procedure applies to Microsoft Word, Microsoft Excel and Microsoft PowerPoint from Office 2010 onwards, and consists of 4 steps.
Copying your flowchart’s share link
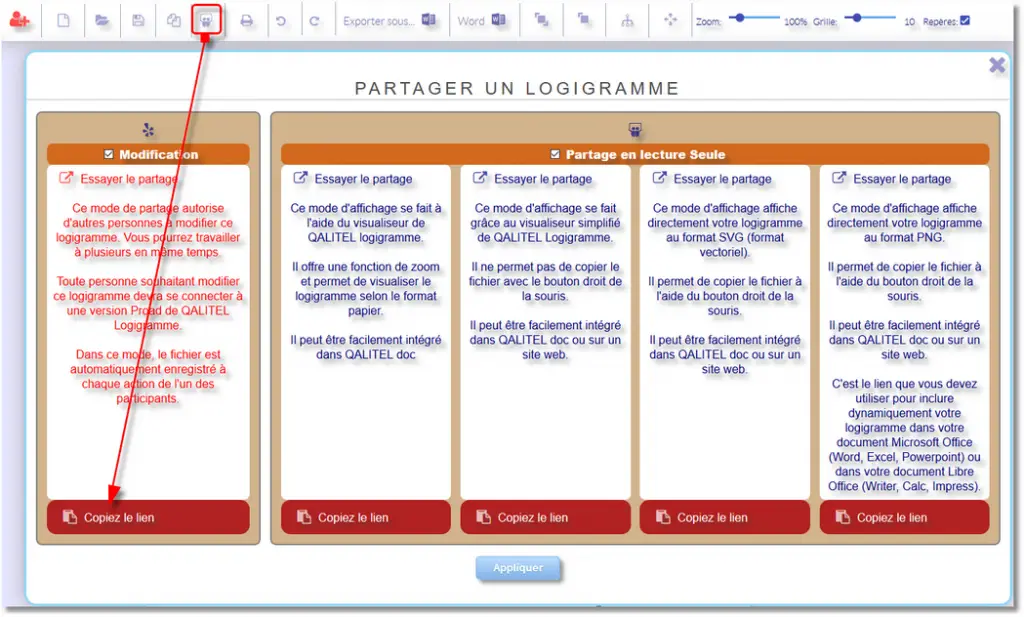
In QALITEL logigramme, click the “Share” icon to copy your flowchart’s share link, as shown in the screenshot below.
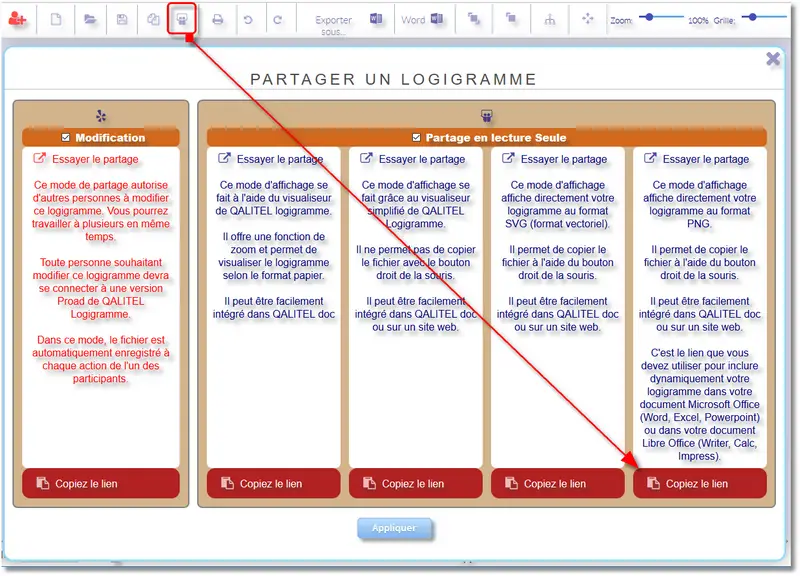
Be sure to copy the link from the 4th column (under “Read-only sharing”), which corresponds to the .PNG image of your flowchart — the only one that can be embedded in Microsoft Office software.
Opening the image insertion window
Once the share link is copied to the clipboard, open your Microsoft Office application and follow the steps shown in the screenshot below: click the “Insert” tab, then the “Picture” button.

Pasting the link
Paste the link from the clipboard into the “File name” field (CTRL-V or right-click “Paste”).
Inserting the image
Click the black arrow on the “Insert” button to select the “Link to File” option. This keeps the link between your flowchart and the image embedded in the Office application. So if you update your flowchart in QALITEL logigramme, it will be automatically refreshed the next time you open the Office file.
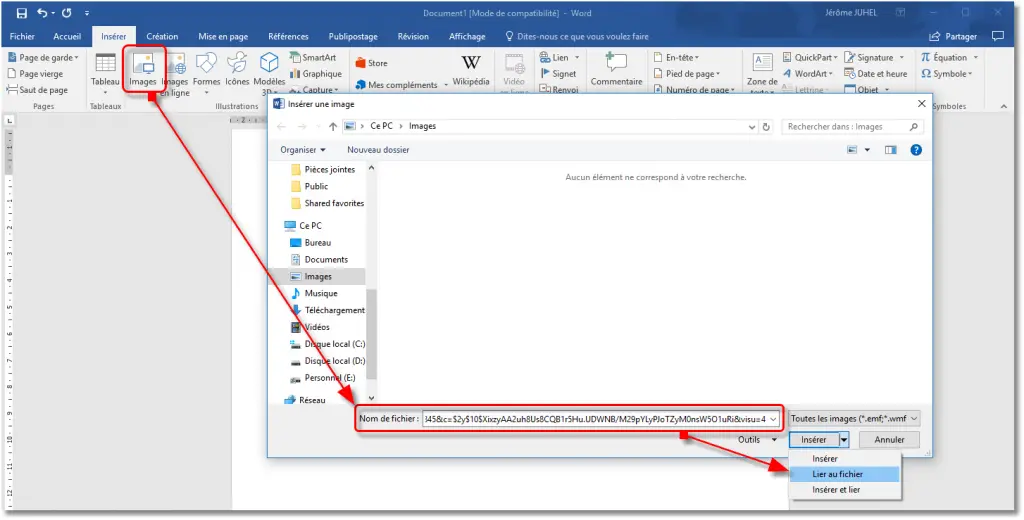
If you select the plain “Insert” option on the “Insert” button, your flowchart image will be embedded but with no link to the original flowchart. Any later changes made in QALITEL logigramme will not be reflected. If needed, you will then have to re-insert the image into your Office document.
Opening the flowchart from the Word document
Earlier, we saw how to embed the flowchart in Word. You can then set up a hyperlink on the image so that the user can click and go straight to editing the flowchart in QALITEL logigramme.
For editing access to work, the user must have a ProAd edition of QALITEL logigramme and be logged in; otherwise they will be asked to enter their credentials. For a user without the ProAd edition, or who is not logged in, the flowchart will remain read-only.
The procedure is as follows:
Copying the “Edit” share link of your flowchart
To do this, in QALITEL logigramme, click the “Share” icon to copy the “Edit” share link of your flowchart, as shown in the screenshot below:
Creating the hyperlink in Word
Then open Word and your document to access your flowchart. As shown in the screenshot below, select the image by clicking once on it, then click the “Insert” tab. Click the “Links” button to open the hyperlink insertion window. Paste the previously copied link into the “Address” line, confirm with “OK”, and save your document.
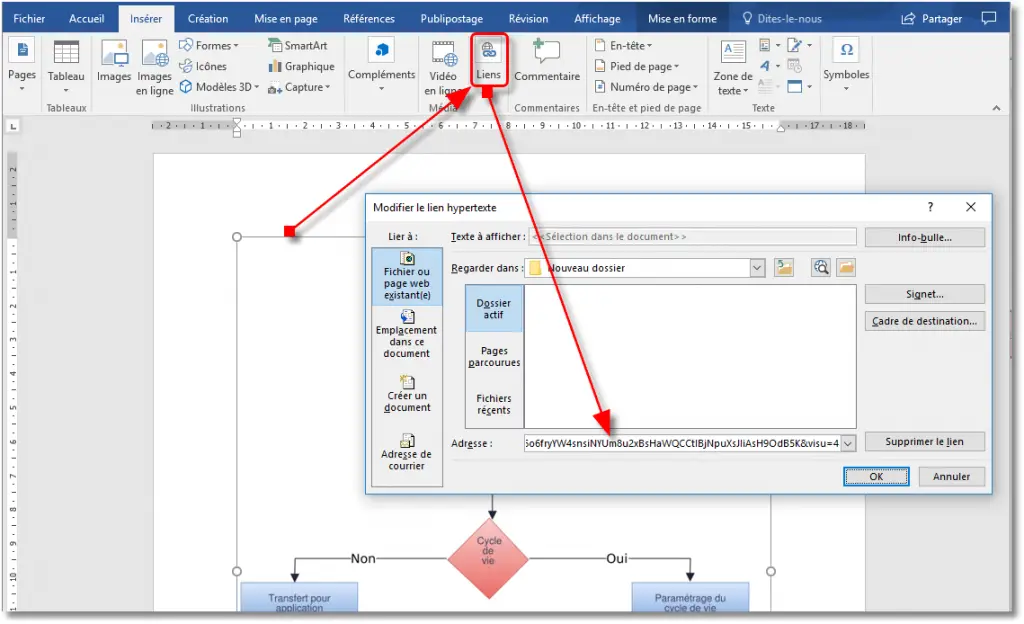
Then, when you open your Word document, you will need to hold the “Ctrl” key and click the image to open the flowchart for editing in QALITEL logigramme (subject to the conditions stated above).
Warning message when exporting the flowchart
Depending on your web browser settings, a warning window may appear when you export your flowchart (into Word, for example).
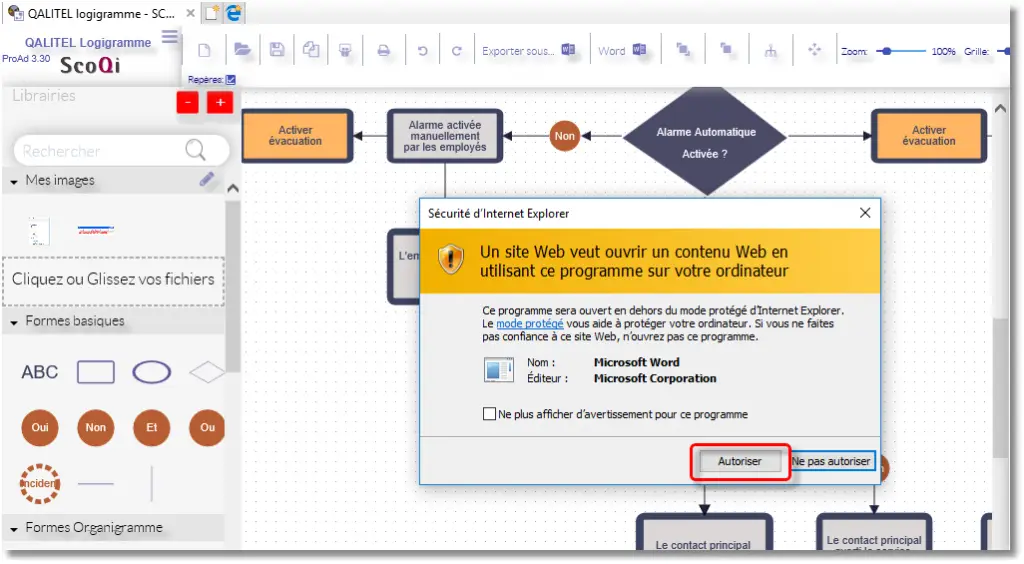
Then click the “Allow” button to open Word and view your document. It is not advisable to tick the checkbox offered, as it is always useful to be warned before displaying documents from the Internet, so that you only allow those whose source you trust.
Warning message when opening the Word document
Opening a document that references a web page — which is the case when a flowchart is embedded in Word (per the procedures described above) — is usually displayed by Word in “Protected View”. You then get a yellow bar with an “Enable Editing” button, letting you switch the document from “Read-only” to “Editing” mode.
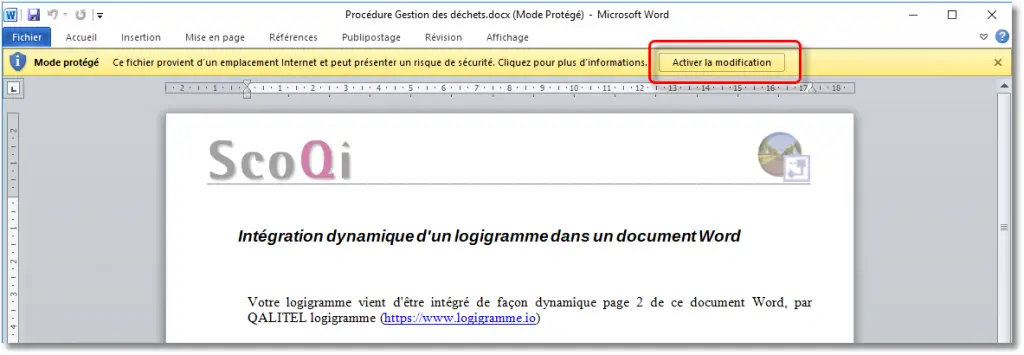
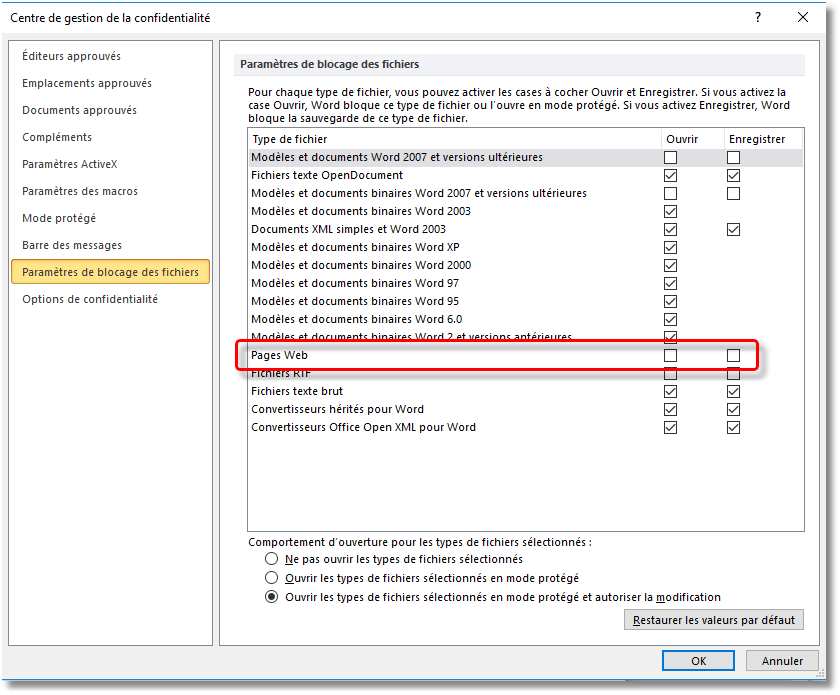
This Word behaviour can be configured in the “Options”, but, following the same principle as the previous point, it is always preferable to switch to “Editing” mode manually, as it lets you verify the origin and reliability of the document.
If you still want to change the “Options”, go to Word’s “File – Options” menu, then under “Trust Center”, click the “Trust Center Settings…” button.
Demonstration video in Word
Ready to export your first flowchart ?
Microsoft Office and LibreOffice export is part of the ProAd edition, available for purchase or monthly rental.